Hi Guys
This post very usefull to Learn weblogic Instalation k....
Where we download the oracle weblogic server. its devolopment purpose its free download
the location
1. I’ve created an operating user “oracle” to own the WebLogic Server, so as a “root” Super User do the following:
2. Now login as “oracle” and invoke the installer
(I’ve downloaded the installer at /u01/dumps) as seen below. Click “Next”
3. Enter the location for Middle Ware Home and click “Next”
7. If you have previous JDK/JRockit SDK, you can choose to browse the path, although Oracle recommends that you download the latest JRockit SDK to use with WebLogic. You can download the latest JRockit from:
http://www.oracle.com/technology/products/jrockit/index.html
8. Choose “Product Installation Directories” and click “Next”
9. Review the Installation Summary and click “Next”
11. Once clicked “Done”,
Finish u r weblogic Instalation .....
The above steps are GUI based like ./server10.3_linux32.bin
another two modes to install weblogic server
2)console based
./server10.3_linux32.bin -mode=console
3) silent Mode
In silent mode we prepare one xml file. that contains wl_home and java_home......
it is non interacted face instalation
This post very usefull to Learn weblogic Instalation k....
Where we download the oracle weblogic server. its devolopment purpose its free download
the location
Software
1. Download Weblogic Server from the following URL:
2. Review documentation to meet the basic hardware and software requirements:
Installation
1 | #groupadd dba |
2 | #useradd -g dba oracle |
3 | #mkdir -p /u01/oracle/middleware |
4 | #chown -Rh oracle:dba /u01/oracle/middleware |
5 | #xhost + |
2. Now login as “oracle” and invoke the installer
(I’ve downloaded the installer at /u01/dumps) as seen below. Click “Next”
4. Register for Security Updates if you wish to and click “Next”
5. Choose Install Type, I’ve chosen “Custom” and click “Next”
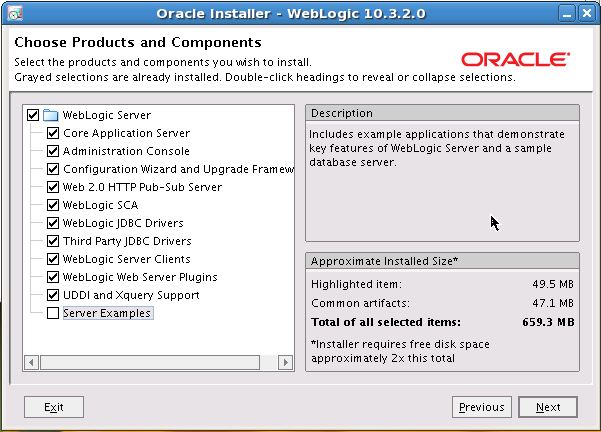
6. Choose “Products and Components” you wish to use and click “Next”
7. If you have previous JDK/JRockit SDK, you can choose to browse the path, although Oracle recommends that you download the latest JRockit SDK to use with WebLogic. You can download the latest JRockit from:
http://www.oracle.com/technology/products/jrockit/index.html
8. Choose “Product Installation Directories” and click “Next”
10. Once the installation completes, the “Run QuickStart” is checked. We’ll launch the QuickStart by clicking “Done”
Finish u r weblogic Instalation .....
The above steps are GUI based like ./server10.3_linux32.bin
another two modes to install weblogic server
2)console based
./server10.3_linux32.bin -mode=console
3) silent Mode
In silent mode we prepare one xml file. that contains wl_home and java_home......
it is non interacted face instalation


No comments:
Post a Comment