Showing posts with label Admin server. Show all posts

Monday, December 17, 2012

WEBLOGIC COMMON


Managed Weblogic Server


Weblogic Managed Servers:

In this post I will be providing some basic idea about the Weblogic Domain and its component called Managed Weblogic Server.

What is Weblogic Domain?

A domain is the basic administration unit for WebLogic Server instances. A domain consists of one or more WebLogic Server instances (and their associated resources such as JDBC resource or JMS resource) that can be managed with a single Administration Server.
A minimal domain can contain only one WebLogic Server instance, which functions both as an Administration Server, and as a Managed server. This instance is called as Weblogic Administration Server or Weblogic Admin Sever.
As it is the only instance present in domain so this Weblogic Admin Server can also be used as Managed Weblogic Server.
Below figure Fig.1 , shows a minimal Weblogic domain containing only one Admin Server.
Fig.1 Weblogic domain with Admin Server only.

Till now I hope, the concept of Weblogic Domain is clear.
As terms Weblogic Admin Server and Weblogic Managed Server has been used, let me explain each of them separately.

Weblogic Admin Server OR Weblogic Administration Server:

The minimum requirement for a Weblogic Domain to exist is that it must contain one Administration Server. This Weblogic Server Instance is basically used for the Administrative purpose of complete Weblogic domain.
This Admin Server can also be used for the purpose of deployment of applications along with Administrative purpose and in that case the Admin Server is acting as Managed Weblogic Server instance.

Managed Weblogic Server:

Any other server instance other than Administrative Server of a Weblogic domain is called as Managed Weblogic Server. Managed Servers host the components and associated resources that constitute the applications—for example, JSPs and EJBs.
Below figure Fig. 2 Shows A Weblogic Domain with 1 Admin Server and 1 Managed Server on a Single Machine.
Weblogic domain with Admin Server and one Managed Server.
Fig.2 Weblogic domain with Admin Server and one Managed Server.

Steps to reset console password on WLS 8x :


In the example below we are creating a new console user and password in WLS 8x :
Below are the steps for password recovery  :
STEP 1 :  Firstly, Stop the server if running and make sure that weblogic.jar is in the classpath.
STEP 2 : Open a command prompt and navigate to ” D:\bea816\user_projects\domains\mydomain “  and run “setEnv.cmd “
STEP 3 : Now run the following command :
“Java weblogic.security.utils.AdminAccount NewAdminUser NewAdminPassword . “
where ” NewAdminUser ” and ” NewAdminPassword ” are the new user and password you would like to create.
Note : The “ . “ (period) at the end of the command is very important..!! as it tells the command that this should be run in the domain directory.
STEP 4 : The above command creates a file “ DefaultAuthenticatorInit.ldift “ in the domain directory. ( as shown below )
.

STEP 5 : Delete the file “ DefaultAuthenticatormyrealmInit.initialized “ located in D:\bea816\user_projects\domains\mydomain\myserver\ldap “
STEP 6 : Clear the contents of boot.properties file located in ” D:\bea816\user_projects\domains\mydomain “
STEP 7 : Now start the server and login with the new user and password. 

Friday, November 9, 2012

How to deploy application using weblogic Admin console

Steps to Deploy Application using Administration Console


In this post I’ll cover steps to deploy application using Administration Console

Download Sample Application on Internet or otherwise use sample apllication like medrec and deploy on WebLogic Server.

1. Start Administration Server...

2. access the Admin console using Admin IP:port/console
            http://127.0.0.1:7001/console

3. Login using User (with admin or deployer role)  weblogic in my case

4. First step is to acquire Lock as shown in screen


5) Click on deployments 

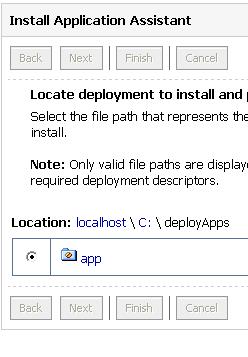
6) Click on Install button

7) Select Application (war, jar, ear) File . You should get this application (war, ear, jar) file from development team.

Select Install this deployment as Application and click Next


9) Activate Canges by clicking on button on left as shown in screen


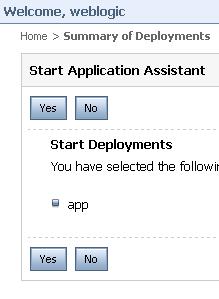
10) Start Application by clicking on Start Button